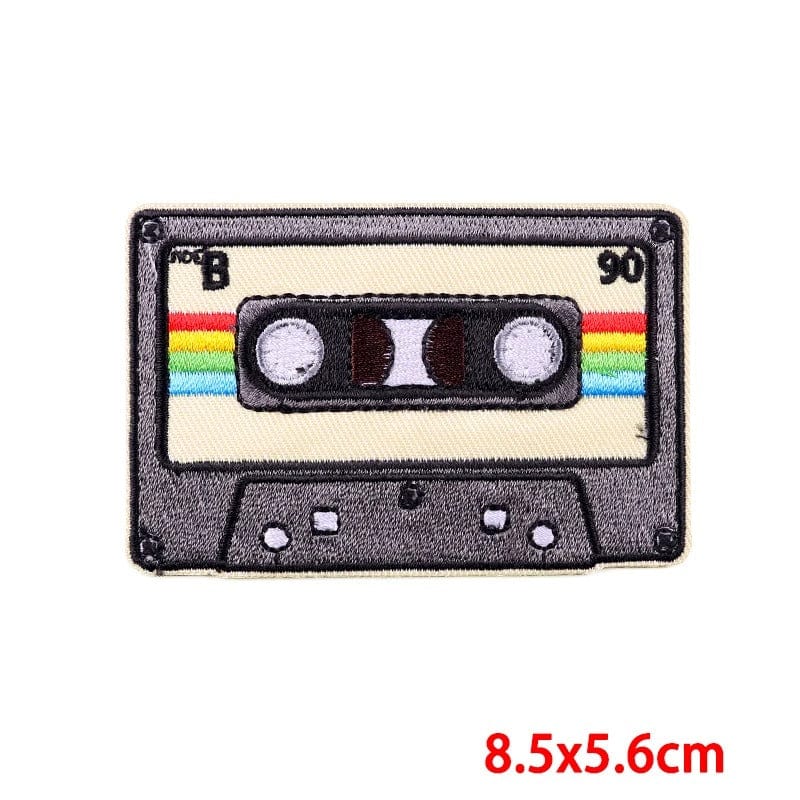
Cassette Tape Patch Iron Sew On Jeans Jacket T Shirt Cap Music Embroidered Badge
Cassette Tape Patch Iron Sew On Jeans Jacket T Shirt Cap Music Embroidered Badge
Tagged: 80s, Beige, Cassette Tape, Grey, Music, Object, Old School, Rainbow, Retro
Out of stock
Couldn't load pickup availability
Share
Add a touch of retro charm and music-inspired flair to your wardrobe or accessories with this Cassette Tape Patch. Measuring 8.5 cm in width and 5.6 cm in height, this beautifully crafted embroidered patch features a classic retro cassette tape design in a sophisticated color palette of grey and beige, complemented by vibrant rainbow stripes that evoke a sense of nostalgia and creativity. The cassette tape symbolizes the golden era of music, making this patch the perfect addition for any music lover or vintage enthusiast.
Whether you want to personalize your jeans, jacket, T-shirt, or cap, this patch is designed to enhance your style with a pop of color and a playful, music-inspired aesthetic. The high-quality embroidery ensures durability, allowing the patch to stay vibrant and intact for years to come, while the combination of soft tones and rainbow stripes gives it a unique, eye-catching appeal that is both retro and modern.
How to Iron on the Patch: Ironing on this patch is a quick and simple way to give your items a cool, personalized touch. To do so, follow these easy steps:
- Position the Patch: Place the patch on your chosen fabric in the desired location. Make sure it’s aligned and centered for a professional look.
- Cover with a Cloth: Lay a thin piece of cloth (like a cotton handkerchief, pillowcase, or tea towel) over the patch to prevent direct contact with the iron.
- Iron the Patch: Set your iron to medium-high heat, ensuring it is dry (no steam). Press down firmly on the patch for about 20-30 seconds, moving the iron around slightly to ensure even heat distribution.
- Check and Cool: Let the patch cool for a minute or so to allow the adhesive to set. Gently check the edges of the patch to ensure it’s fully adhered. If necessary, repeat the ironing process.
How to Sew on the Patch: For a more permanent, professional look, sewing on the patch is a great option. Here’s how you can sew it on:
- Position the Patch: Place the patch on your item in the desired location. Pin it in place to keep it steady while sewing.
- Thread the Needle: Choose a thread color that matches the patch or the fabric of your item. Thread a needle and tie a small knot at the end of the thread.
- Sew Around the Edges: Using a simple running stitch or whip stitch, sew around the edges of the patch to secure it to the fabric. Make sure to keep your stitches neat and even for a clean, professional finish.
- Tie Off the Thread: Once you’ve sewn all the way around the patch, tie a knot to secure the thread, and trim off any excess.
Iron and Sew On Option: For extra security and a polished look, you can combine both methods—iron the patch first to help it adhere to the fabric, and then sew around the edges for a lasting, reinforced hold. This combination ensures that your patch will stay securely in place, even after multiple washes.
Whether you’re expressing your love for music or simply adding a nostalgic touch to your belongings, this Cassette Tape Patch is a must-have accessory. With its timeless retro design, vibrant rainbow stripes, and easy application methods, it’s the perfect way to personalize your favorite clothing or accessories in style.


